Project Wiki
Setup
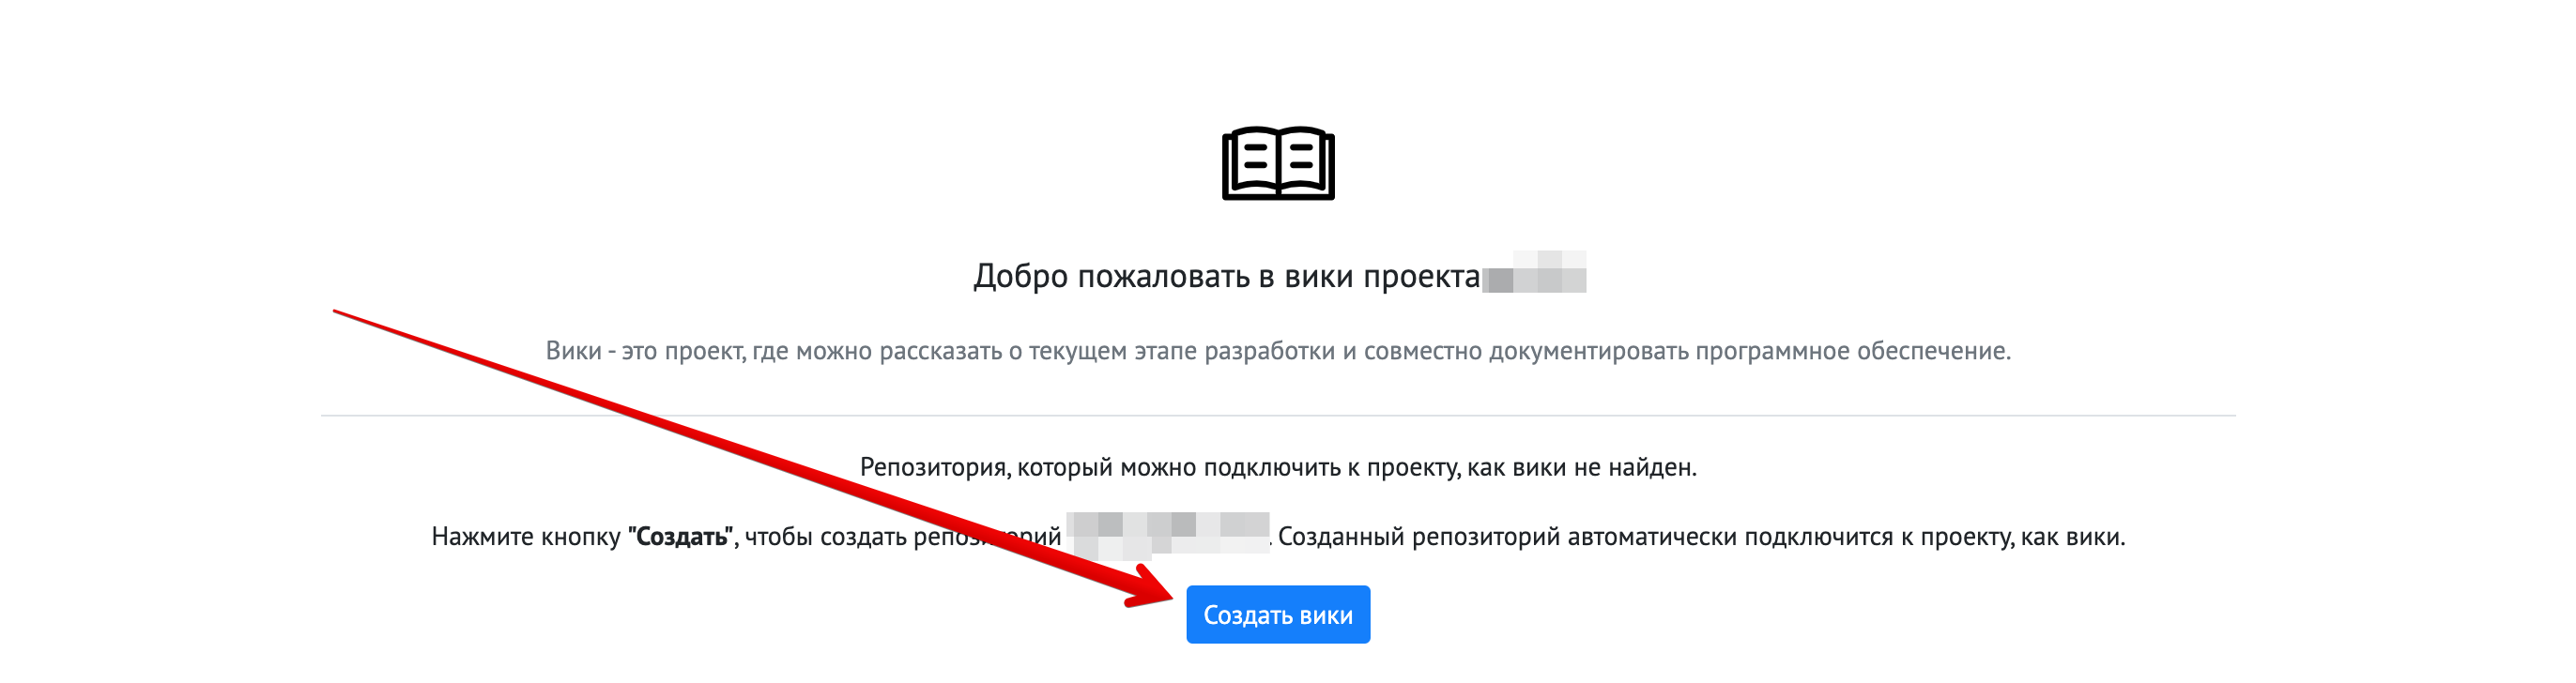
To activate documentation (wiki) for your project, open the tab on the project page named “Wiki”. On the page, there will be a simple setup wizard where you only need to click the “Create Wiki” button. A private project with the corresponding name will appear in your profile or your company’s profile.

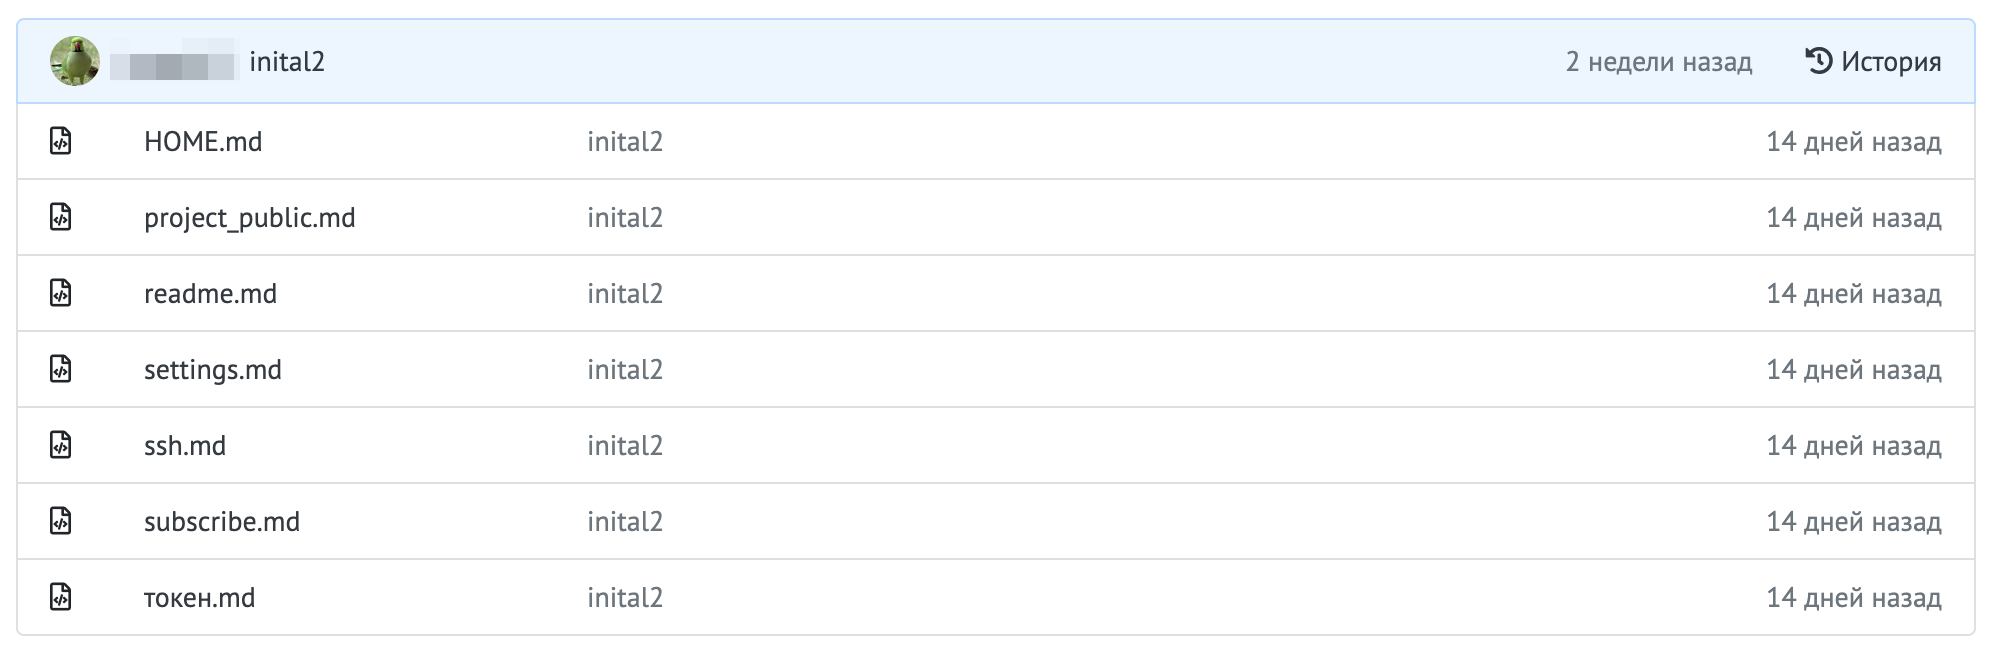
Add text files in markdown format to the new Wiki project; you can also organize groups of files into folders. The start screen is initialized by adding a home.md file to the root.
Usage
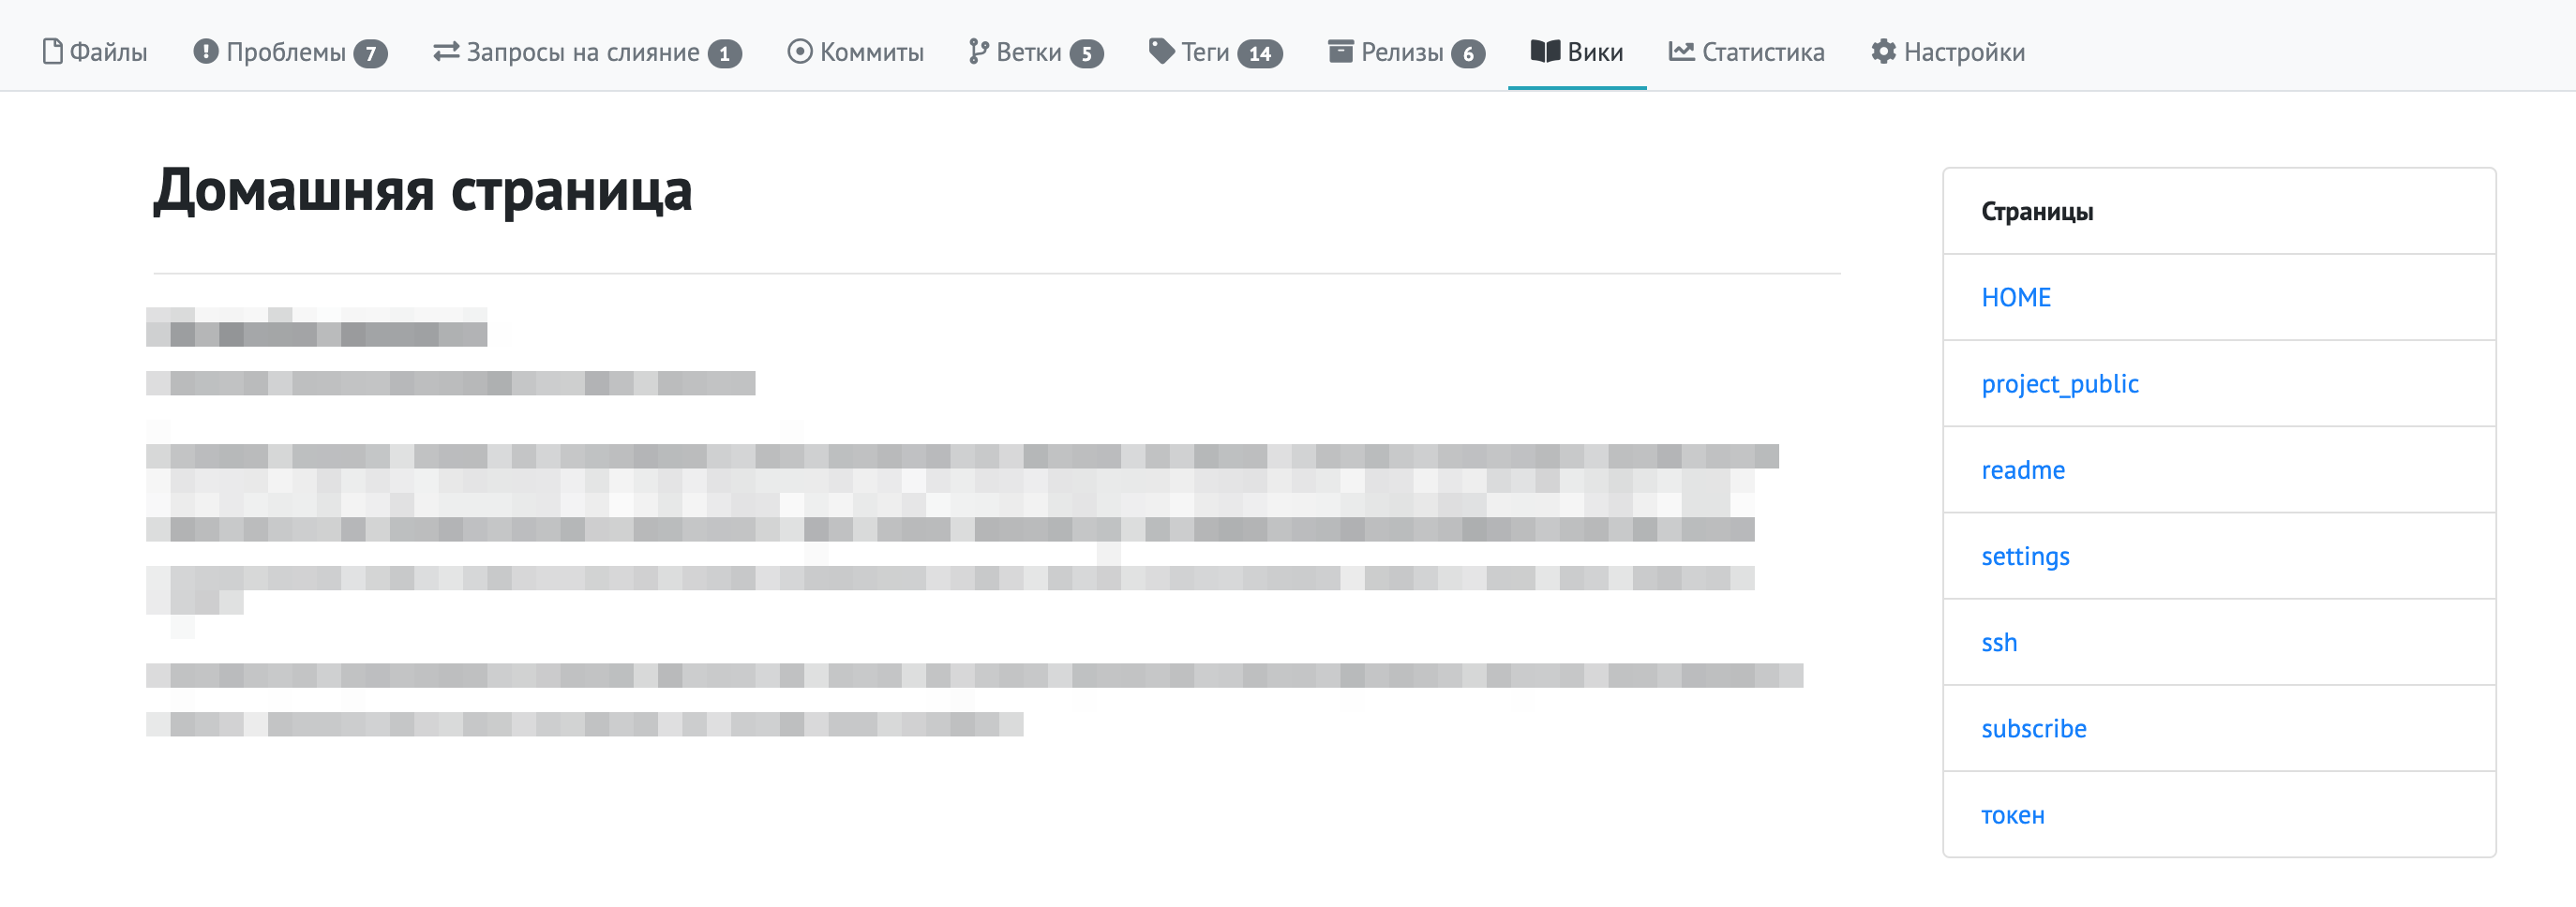
After adding enough pages describing your project, the wiki will be available on the “Wiki” tab in your project. You can add new files and edit existing ones; changes to the documentation will be published immediately after uploading to the wiki project.
You can fork the wiki project to suggest your improvements to the existing documentation.
To unlink the wiki project from your main project, go to the project settings, in the General section, scroll down to the “Danger Zone” block, and click “Unlink Wiki Repository”. The wiki project will not be deleted; it will remain in your list of projects, only the link between the projects will be removed.
When transferring a project with connected documentation, only the main project is transferred; the wiki project must be transferred separately from the main one.
Note
You can make the wiki project private; in this case, it will still be available to readers in your working project and will not be displayed on the page of all your company’s projects or in your profile.
Automated translation!
This page was translated using automatic translation tools. The text may contain inaccuracies.