Components
A CI/CD component is a single, reusable pipeline configuration module. Using components allows you to create either a small part of a larger pipeline or a complete pipeline configuration. Using inputs allows you to specify required input parameters, making the use of components more convenient.
CI/CD components are similar to other configurations added via the include keyword but offer several advantages:
- Components can be listed in the CI/CD catalog.
- Components can be released and used with a specific version.
- Multiple components can be defined within a single project.
- Instead of creating your own components, you can use published public components that offer the required functionality.
Catalog Project
A catalog is a project intended for storing components. All components within a single catalog are versioned together. A maximum of 30 components are allowed in one catalog.
To create a catalog, you need to create a regular project. Then, in the project settings, under the General section, change the position of the CI/CD Catalog Project toggle. The CI/CD Components tab will become available in the project navigation panel.

For convenience, it is recommended to reorder the sections in the navigation panel within the main project settings section.

Creating a Component
Each component is a separate file with a .yml extension, which must be located in the templates directory at the project root. For convenience, it is recommended to:
- Place a
README.mdfile at the project root with useful information about the component structure, their purpose, and functionality. - Create a
gitflic-ci.yamlfile for automatic release creation.
├── templates/
│   └── my-component.yml
├── README.md
└── gitflic-ci.yaml
If necessary, it is possible to create subdirectories within templates containing files that will form the basis of the components. In this format, the component name will be composed from the subdirectory name, and the component itself can only be formed from files named template.yml. This format is useful if individual components require the placement of additional files, such as a Dockerfile or a specific README.md.
├── templates/
│   ├── my-component.yml
│   └── my-other-component/
│       ├── template.yml
│       ├── Dockerfile
│       └── test.sh
├── README.md
└── gitflic-ci.yaml
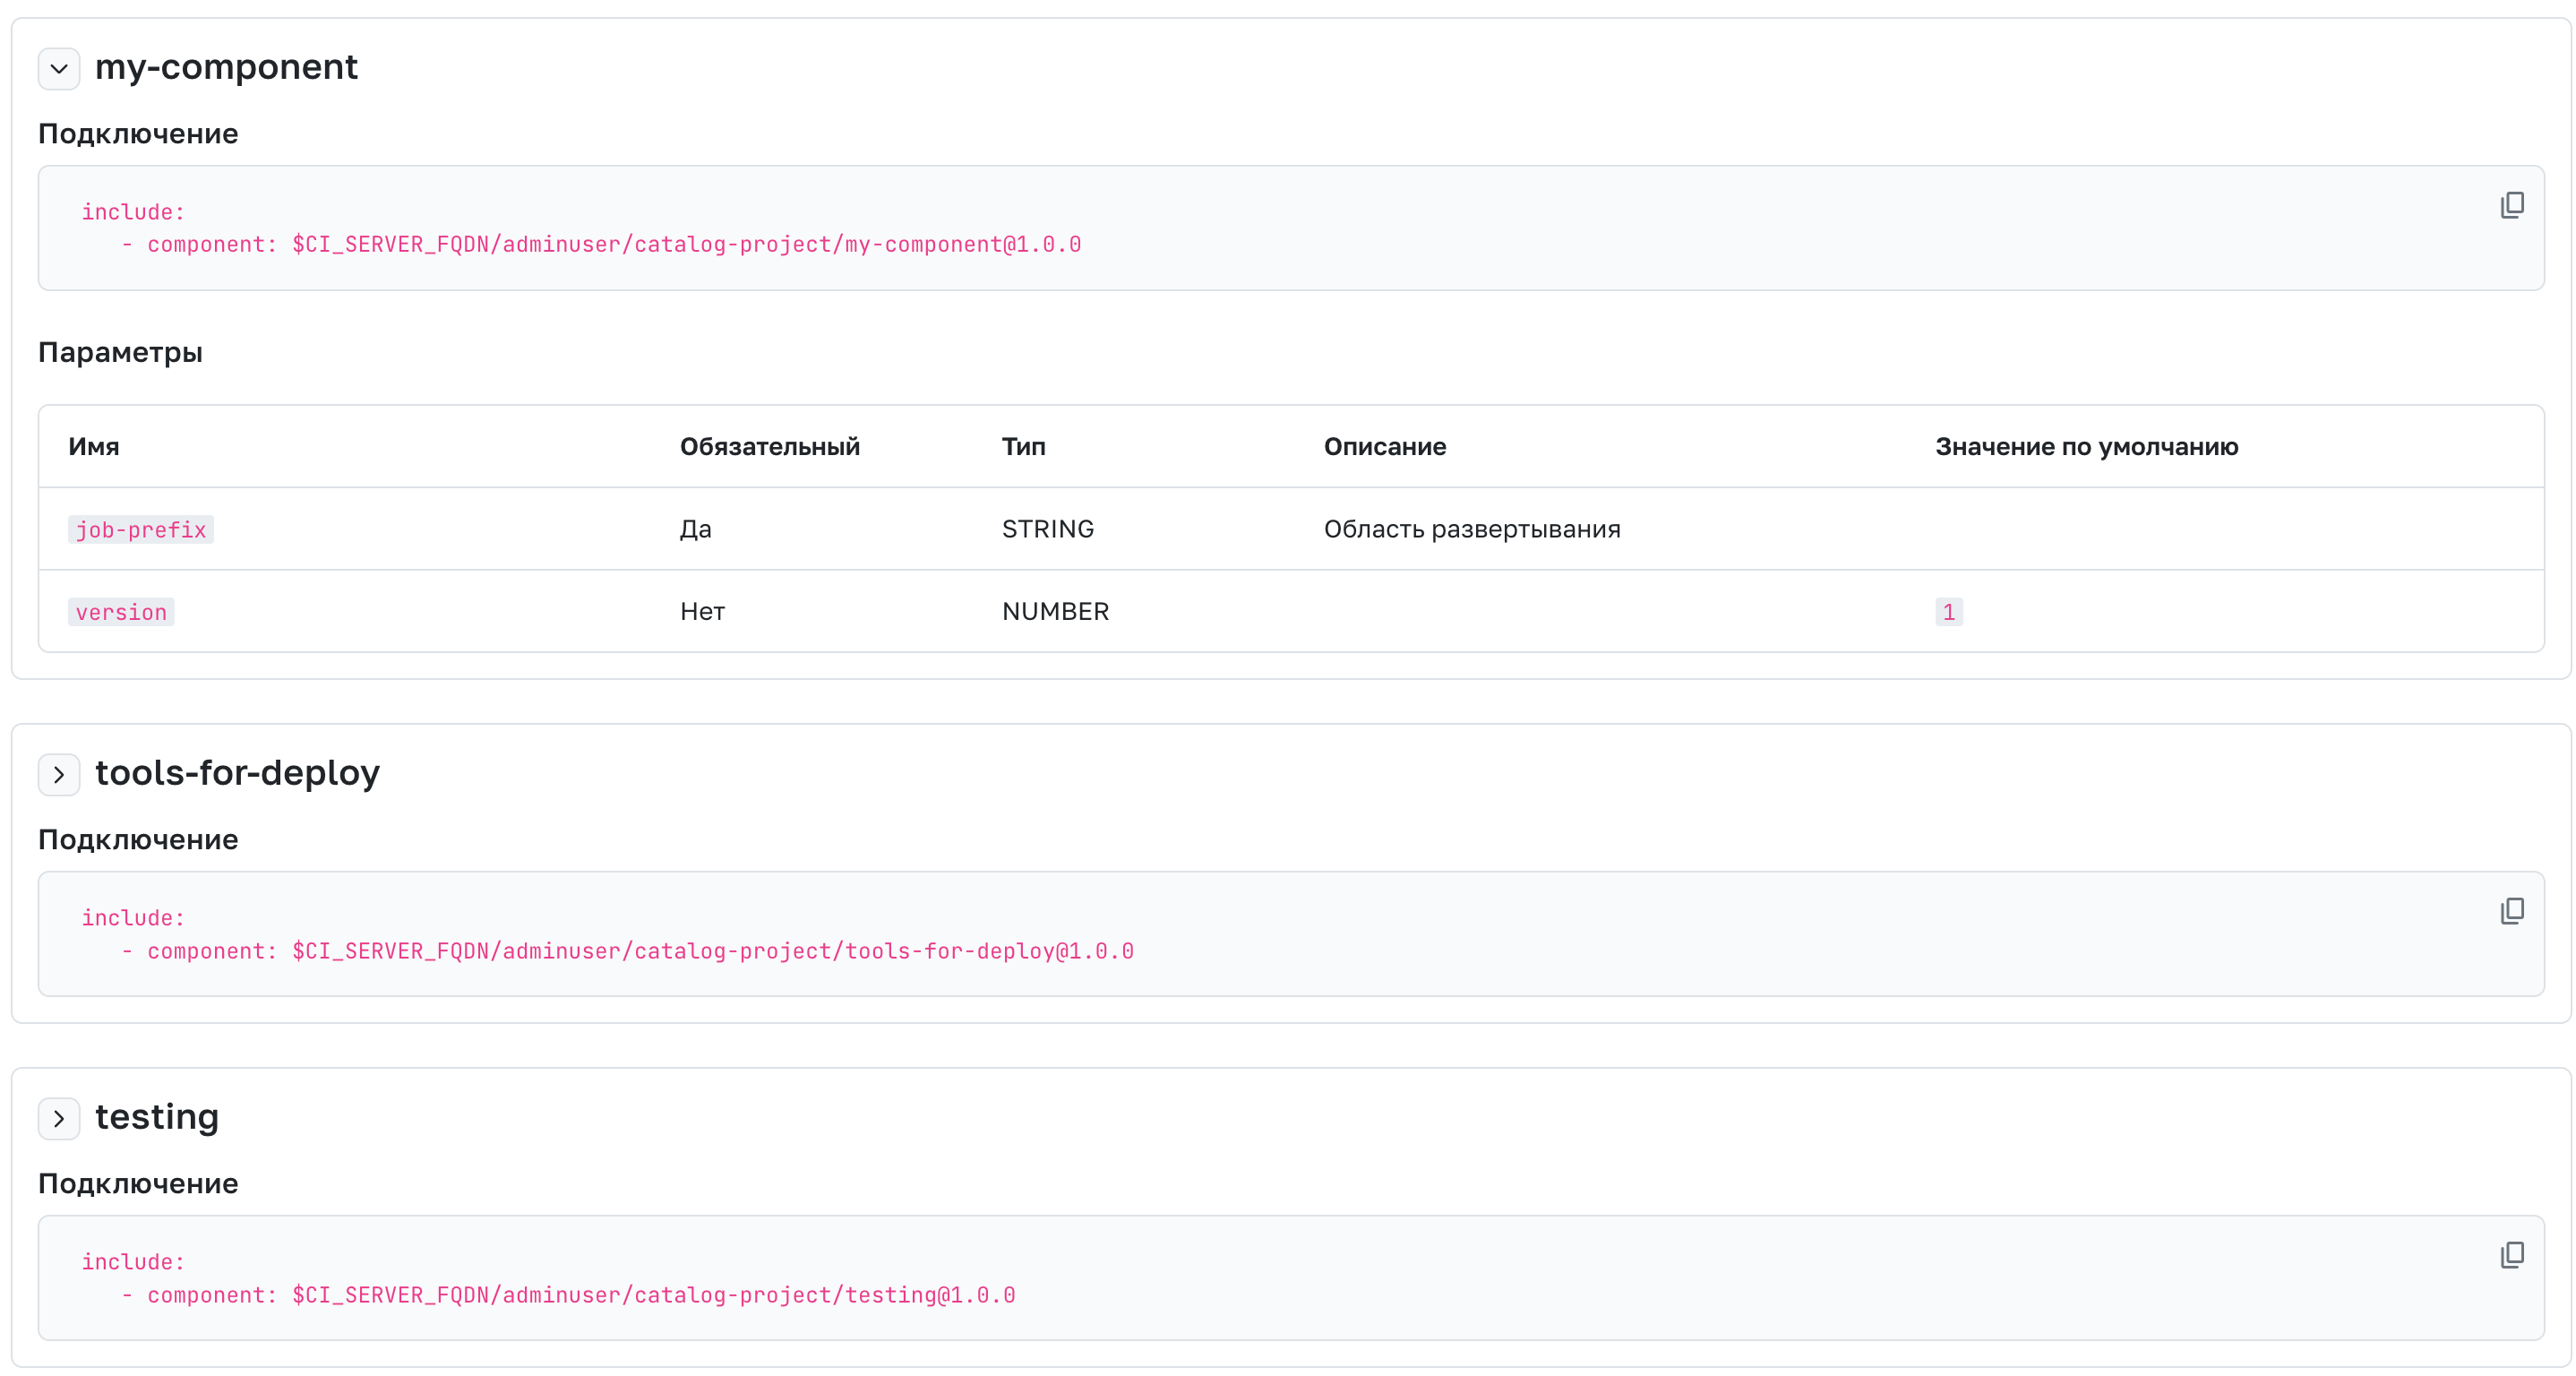
After forming the chosen structure, you need to create a tag, for which a release should be created with a name matching the regular expression \d+\.\d+\.\d+ (for example, 1.0.0). After creating the release, all formed components will be displayed on the CI/CD Components tab, along with instructions for connecting them and information about the inputs used in them.
Using Components
To add a component to the pipeline configuration, use the include: components keyword in the following format:
include:
  - component: $CI_SERVER_FQDN/{ownerAlias}/{catalogAlias}/{componentName}@{componentVersion}
    inputs:
      {inputsName}: {inputsValue}
| Path Variable | Description |
|---|---|
ownerAlias |
Alias of the catalog project owner |
catalogAlias |
Alias of the catalog project |
componentName |
Name of the component |
componentVersion |
Version of the component |
inputsName |
Name of the input data |
inputsValue |
Value of the input data |
Example:
User adminuser owns a catalog project with the alias catalog-project. This catalog contains a component named my-component with version 1.0.0:
spec:
  inputs:
    job-prefix:
      description: "Deployment environment"
      options: [ "production", "testing", "development" ]
    version:
      default: 1.0
      type: NUMBER
---

$[[ inputs.job-prefix ]]-deployment:
  image: gitflic-$[[ inputs.version ]]
  script:
    - ./$[[ inputs.job-prefix ]]-deployment.sh
In another project, this component needs to be added to the pipeline configuration. The inclusion method could look like this:
include:
  - component: $CI_SERVER_FQDN/adminuser/catalog-project/my-component@1.0.0
    inputs:
      job-prefix: "testing"

build:
  stage: build
  script:
    - ./build.sh
Configuration after using the component
build:
stage: build
script:
- ./build.sh

testing-deployment:
  image: gitflic-1.0
  script:
    - ./testing-deployment.sh
Automatic Translation!
This page was automatically translated. The text may contain inaccuracies